Hello from a slightly (very...) ill Alison, and first of all, apologies for the late post - I've been very busy and very ill the past two weeks.
Anyway, seeing as I'm back off to Scotland early tomorrow morning, I thought I'd get some posts written up and scheduled before I leave (I haven't even packed yet... this was a bad idea!), so here is my makeup look for this halloween and how to get it!
Anyway, seeing as I'm back off to Scotland early tomorrow morning, I thought I'd get some posts written up and scheduled before I leave (I haven't even packed yet... this was a bad idea!), so here is my makeup look for this halloween and how to get it!

This Halloween I was going to a disco and I only had two days to get together my costume with no time to get to the shops, and so I turned to what I had previously said I'd never do - a mouse - and honestly, I loved it!
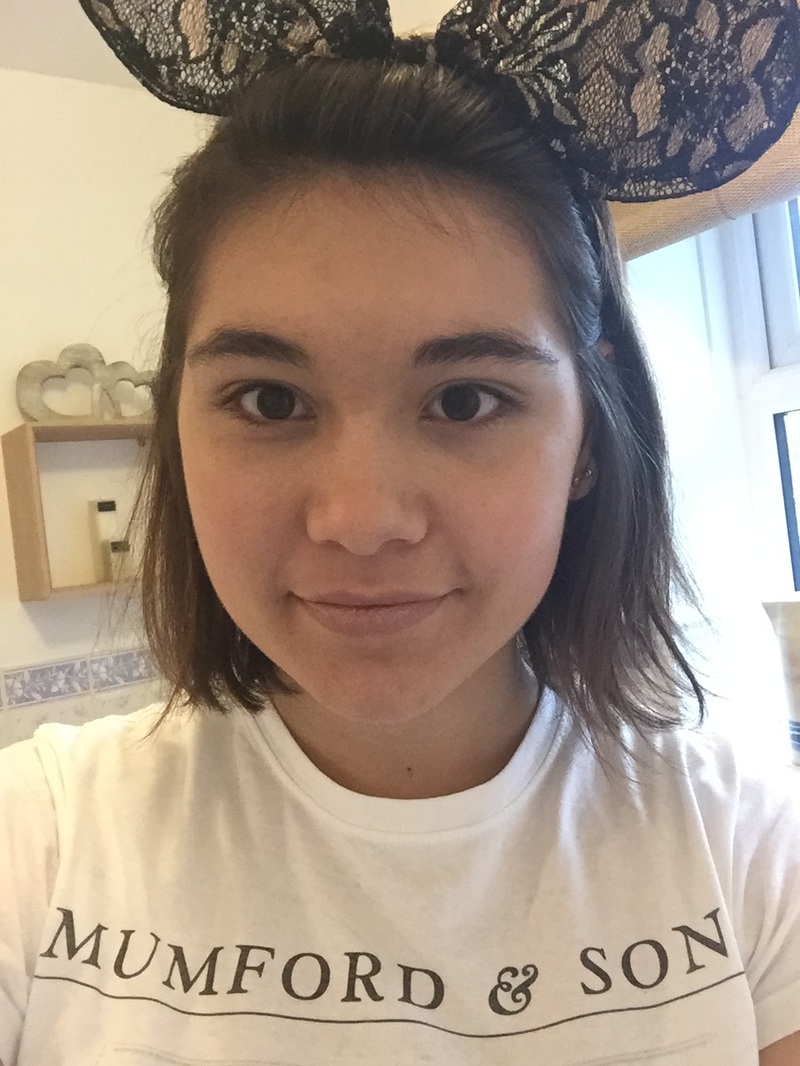
I managed to get a fairly cheap dress and headband from New Look that arrived at my house the afternoon of the disco, and had practiced my makeup the night before, so I was all set.
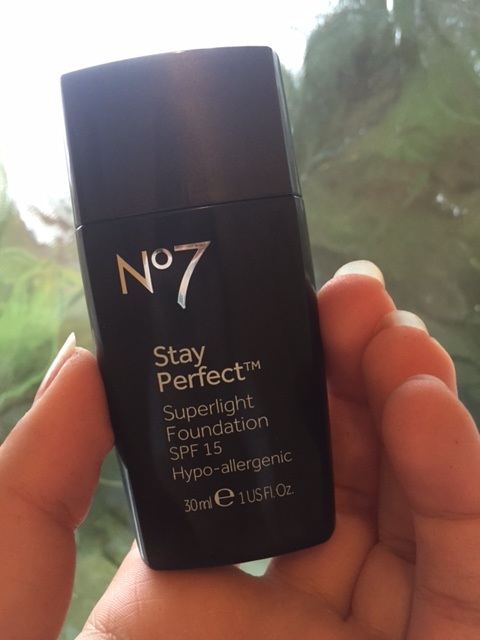
I started out with a base of Natural Collection Concealer, and my new foundation, No7 Stay Perfect in Beige (there's a review of this coming soon), which I applied with a foundation brush. With this, make sure to get the foundation on your lips, as despite being drying, really adds to the final look.
I managed to get a fairly cheap dress and headband from New Look that arrived at my house the afternoon of the disco, and had practiced my makeup the night before, so I was all set.
I started out with a base of Natural Collection Concealer, and my new foundation, No7 Stay Perfect in Beige (there's a review of this coming soon), which I applied with a foundation brush. With this, make sure to get the foundation on your lips, as despite being drying, really adds to the final look.
After this, I moved on my eye makeup, taking most of the shades from one of my older makeup kits.
I started off by putting a cream toned shade all over my lid, followed by a pink on the outside half of my lid and an brown/olive tone in the crease. However, this wasn't quite dark enough, so I added a darker brown in the outer crease (Is that the correct terminology? I'm new to this...).
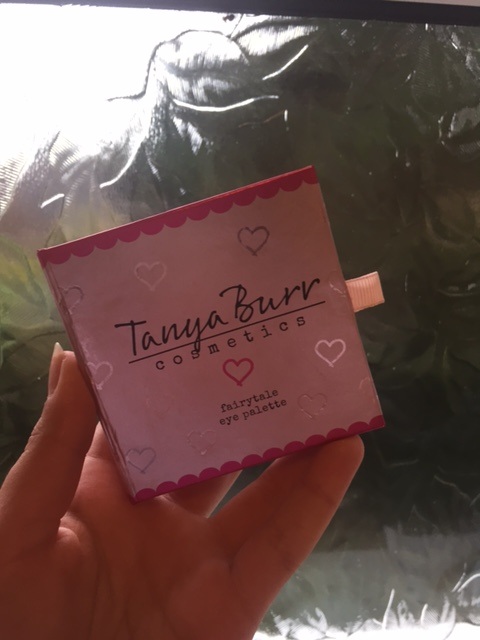
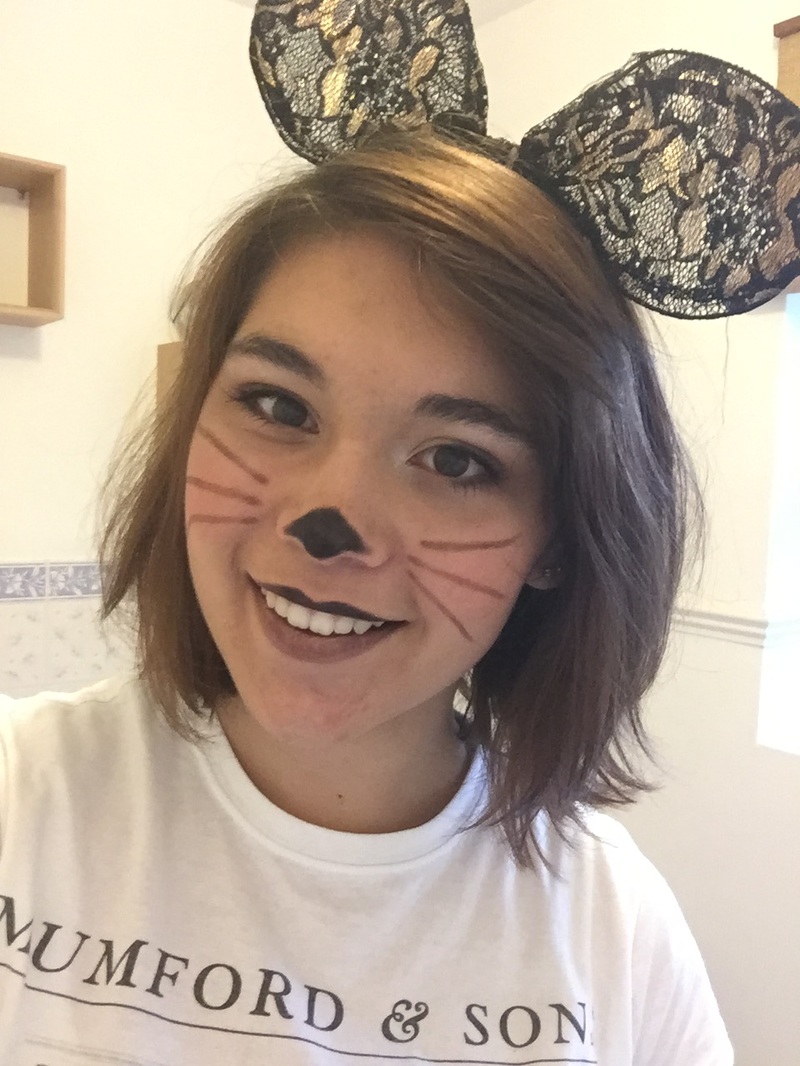
To finish of the eyes, I took the shade Witches Cat, from Tanya Burr's Fairytale eye palette, along my upper lash line, flicking it out slightly at the end, and partially along my lower lash line, and smudged these out a little with my finger.
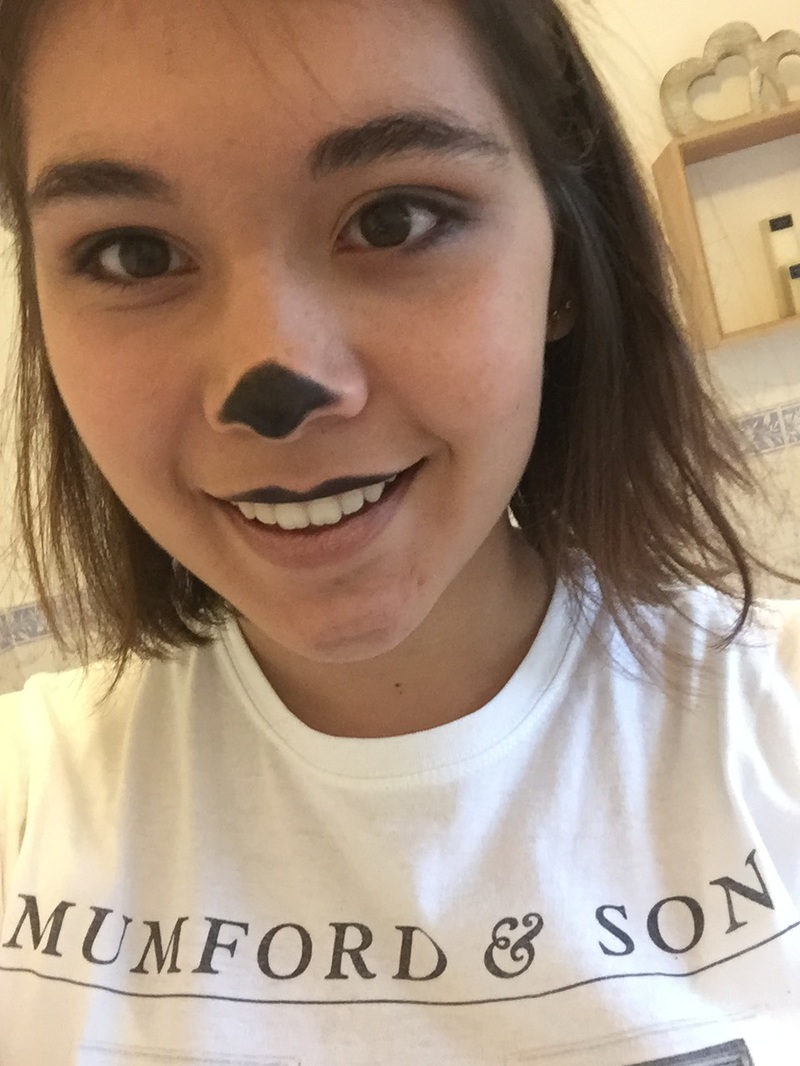
Finally, with this same shade, I drew on a little nose and coloured in my top lip - making it that little bit more mouse like.
I started off by putting a cream toned shade all over my lid, followed by a pink on the outside half of my lid and an brown/olive tone in the crease. However, this wasn't quite dark enough, so I added a darker brown in the outer crease (Is that the correct terminology? I'm new to this...).
To finish of the eyes, I took the shade Witches Cat, from Tanya Burr's Fairytale eye palette, along my upper lash line, flicking it out slightly at the end, and partially along my lower lash line, and smudged these out a little with my finger.
Finally, with this same shade, I drew on a little nose and coloured in my top lip - making it that little bit more mouse like.

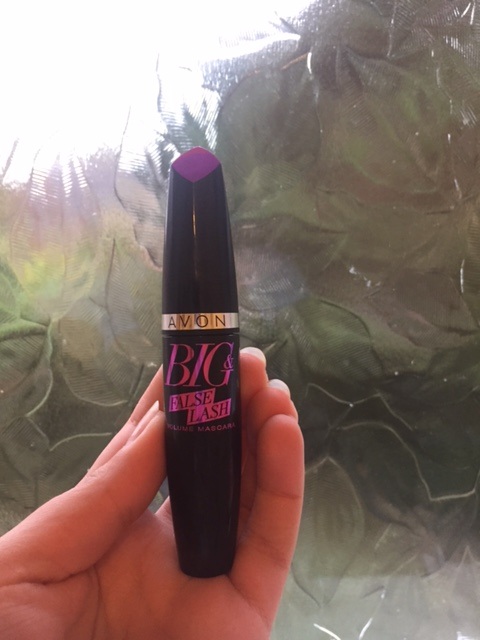
I then added on some of my favourite mascara from Avon, Big False Lash Volume mascara in Black/Brown as it adds a similar amount of volume as my Benefits Roller Lash, but I feel it is that little bit more cutesy/natural as it is brown toned.
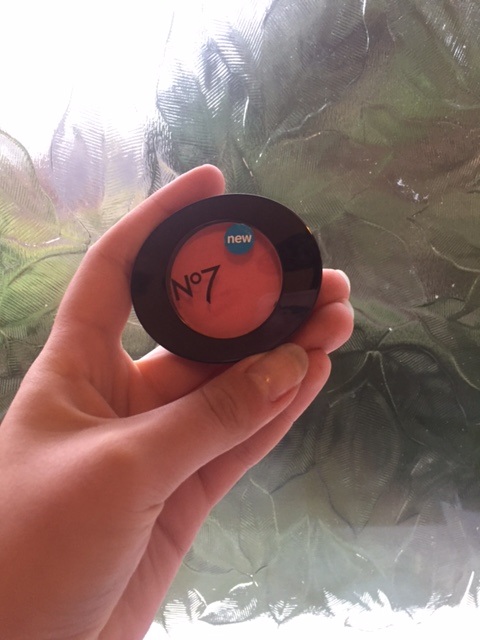
After this, I went on to add blush and a little bit of highlight. I took a sparkly white eye shadow from my previously mentioned makeup kit and popped this on my inner eyelid, brow bone and the tops of my cheek bones, followed up by my new No7 Blush in the shade Peony Mist.
At this point, it is down to you in picking which animal you want to be. If you have cat or mouse ears for example, keep following the steps on here, however, if you want to be a bunny this Halloween, maybe draw some dots instead. Either way, at this stage, it's down to you, follow on or go wild!
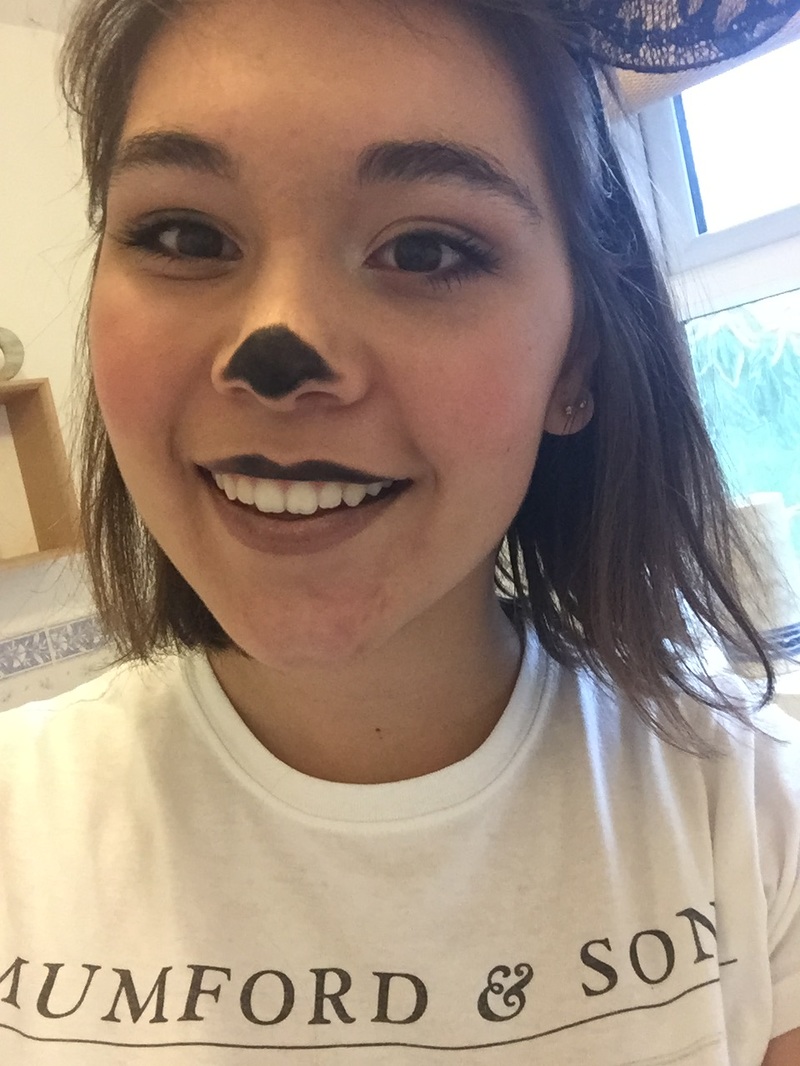
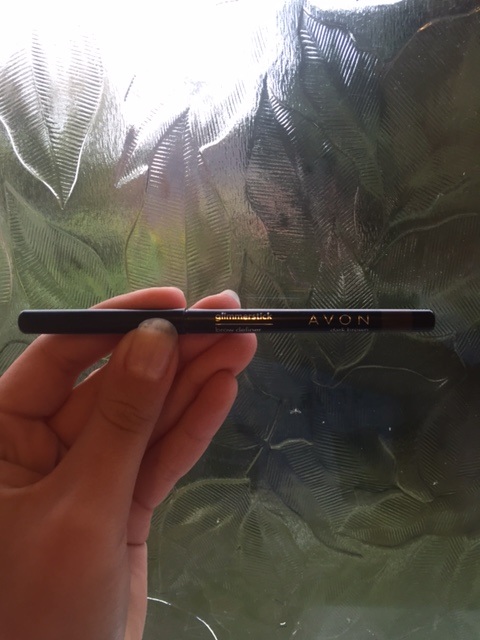
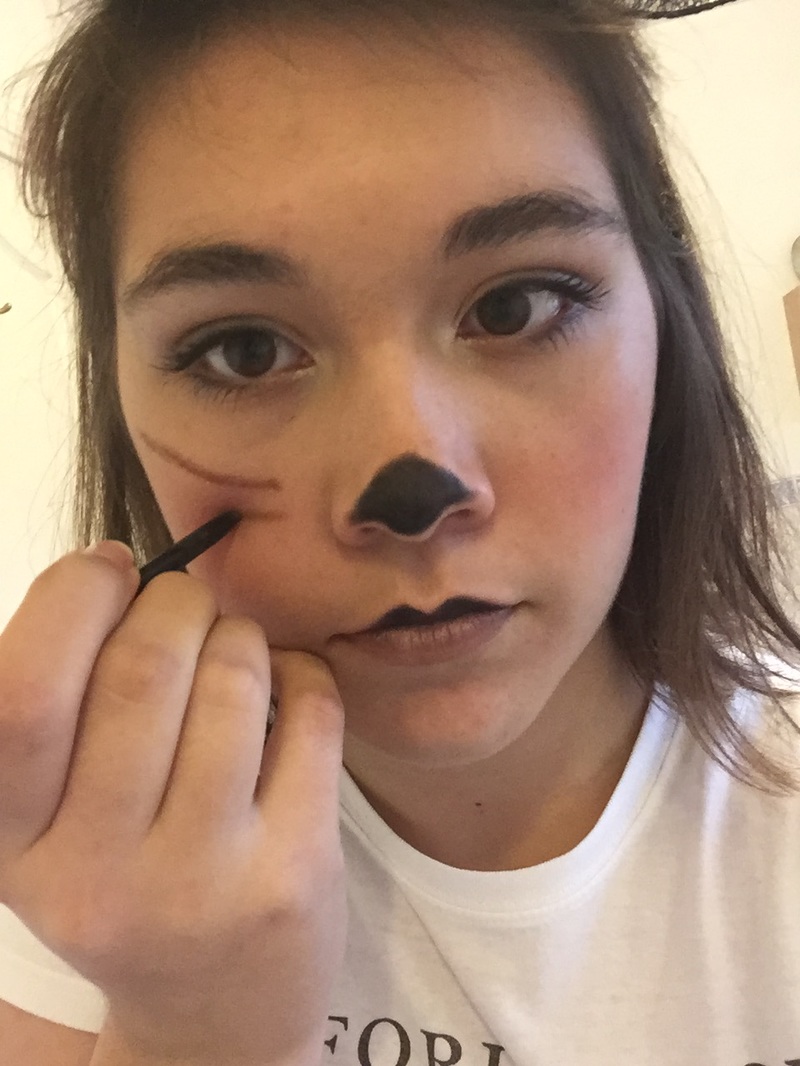
So, seeing as I was going to be a mouse, as I had bought a headband with a lace bow on top that reminded of mouse ears, I went on to add some whiskers. For this, I used another Avon product, but while I used this on my cheeks it is actually a brow pencil... Avon Glimmerstick Brow Definer in Dark Brown. I took this in three lines across my cheeks and that was the makeup look complete.
To finish it all off, I brought my fringe back forward, popped my headband in properly and put on my black dress (which was unfortunately not ready for me to show you for the post!)
To finish it all off, I brought my fringe back forward, popped my headband in properly and put on my black dress (which was unfortunately not ready for me to show you for the post!)
I hope you enjoyed this post, and have a Happy Halloween, it is after all one of the best times of the year.
If you recreate this look, make sure to send me a picture, and if not, tweet a picture of your Halloween costume and makeup anyway, or leave a comment telling me what you're dressing up as - as I would love to see and hear about it!
See you soon with another blog post,
Alison
If you recreate this look, make sure to send me a picture, and if not, tweet a picture of your Halloween costume and makeup anyway, or leave a comment telling me what you're dressing up as - as I would love to see and hear about it!
See you soon with another blog post,
Alison
 RSS Feed
